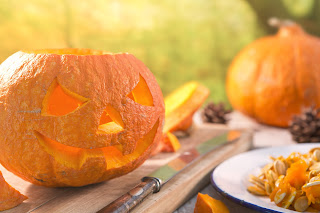
How to Carve the Perfect Pumpkin for Halloween
It’s that time of year again – time for picking out the perfect pumpkin and carving it into a masterpiece! Here are some tips and tricks to finding the perfect pumpkin, gathering the best carving tools, and deciding on what design you want to do.
Step One: Picking the Right Pumpkin
Whether in a pumpkin patch or outside of your local grocery store, there are plenty of places to find the perfect pumpkin. Do you prefer tall and skinny pumpkins or short and rounded pumpkins? Do you prefer pumpkins with warts to add an extra creepy effect, or do you like blemish-free pumpkins? Whichever you prefer, make sure you go with a pumpkin that has enough surface area for the type of design that you want to create. Just remember that a softer pumpkin or a pumpkin with blemishes such as brown vine-looking areas will rot quicker than a firm pumpkin with no blemishes.
Step Two: Assembling Your Tools
You can purchase many fancy tools for carving pumpkins or you can find the correct supplies out of things you may already have around your kitchen. What you need includes non-permanent marker, knives (a variety of sizes from your kitchen), push pins to help you pin up a template if you are using one, an ice cream scoop to remove the guts, and a surface carver to help with scraping out areas on the surface. Many of these tools are available in pumpkin carving kits available at most grocery stores and discount stores. These kits often have a book of templates to utilize as well. If not, you can print out a template online by searching for pumpkin carving templates. If you want to light up your pumpkin's carved design, you will need a battery operated tea light or a small candle for the inside of your pumpkin. Also remember to gather lots of newspaper or a disposable tablecloth to carve on top of for quick clean-up!
Step Three: Carving Time!
First things first, cleaning the outside of the pumpkin will make the design process much easier and make your pumpkin look smoother. Next, cut off the top of your pumpkin and start scooping all of the guts out. You can save the pumpkin seeds and rinse them off with water to stick into the oven and made delicious roasted pumpkin seeds (an easy recipe is below). When you are happy with how clean the inside of your pumpkin looks (make sure to really get in there and get it all scraped out), it is time to turn your attention to the design process.
Do you have a template to put on? Pin it with the push pins on the front of the pumpkin. Then use a push pin to go around the design leaving a path to easy carve along when you have removed the template. Make sure to put enough pins marks in to cut the design all the way around. Do you have a design in mind? Use your black marker to draw your design on the front of the pumpkin and then use a knife to cut out those pieces. The surface scraper is great for areas of the pumpkin that you want to design to let some of the light from the inside of the pumpkin out without cutting larger holes in your pumpkin. Be as creative as you want with your pumpkin – pumpkins can hold just about any design you come up with!
Whether you are carving an elaborate design or a goofy jack-o-lantern face, pumpkin carving is a fun family activity that even the youngest in the family can be involved in. Let youngsters help draw out the design on a piece of paper, scoop out the pumpkin insides, and sort the seeds out from the rest of the goo! Have fun and enjoy building fun memories!
ROASTED PUMPKIN SEEDS:
Preheat oven to 300 degrees. Clean pumpkin seeds thoroughly under running water. Dry seeds by blotting with paper towel. Place seeds in a single layer on a baking sheet. Melt 1 tsp of butter per cup of pumpkin seeds and pour butter over seeds. Use a spatula or large spoon to mix seeds and butter to coat thoroughly. Sprinkle seeds with a pinch of salt and mix again. Bake for 45 minutes to one hour, stirring every 15 minutes. Seeds are done with they are slightly browned and butter is absorbed.


No comments:
Post a Comment